Evilmouse is a covert keystroke injector hidden inside a fully functional mouse, similar in concept to a Rubber Ducky tool. As soon as it connects, it can autonomously execute commands and begin compromising the system.
The Idea
These days, everyone that’s been through basic job security awareness training knows that a USB stick plugged into a computer is suspicious. A mouse, however, might not appear suspicious at all, especially when its functionality is preserved.
Materials
| Material | Quantity | Approx. Price |
|---|---|---|
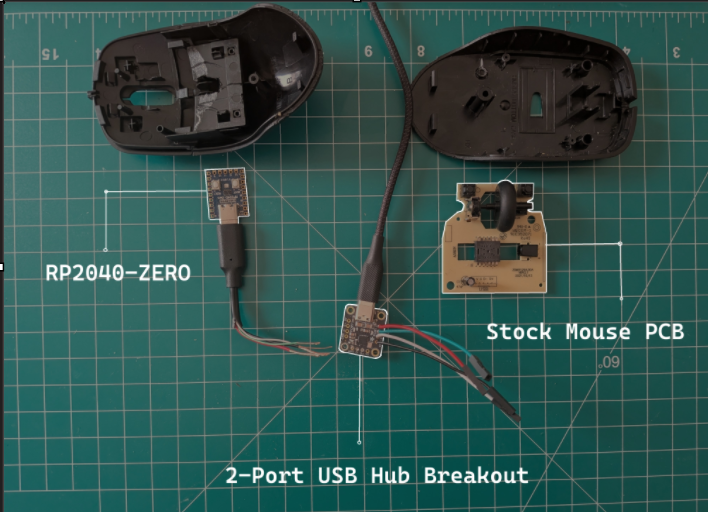
| RP-2040 Zero | 1 | $3 |
| Adafruit 2-Port USB Hub Breakout | 1 | $5 |
| Amazon Basics Mouse | 1 | $6 |
| USB-C Pigtail Cable | 1 | $3 |
| Rosin-core 60/40 Solder | 1 | $8 |
| USB-C Data Cable | 1 | $8 |
| Flux Paste | 1 | $6 |
| Kapton Tape | 1 | $5 |
| Dupont Wires | 4 | basically free (~$0.03) |
| Total | ~$44 |
Not bad considering a rubber ducky will cost you around $100.
Also, if you already have some of these soldering materials, it will be much cheaper.
Building Evilmouse
My first problem was that the shell was suprisingly compact for a cheap $6 mouse.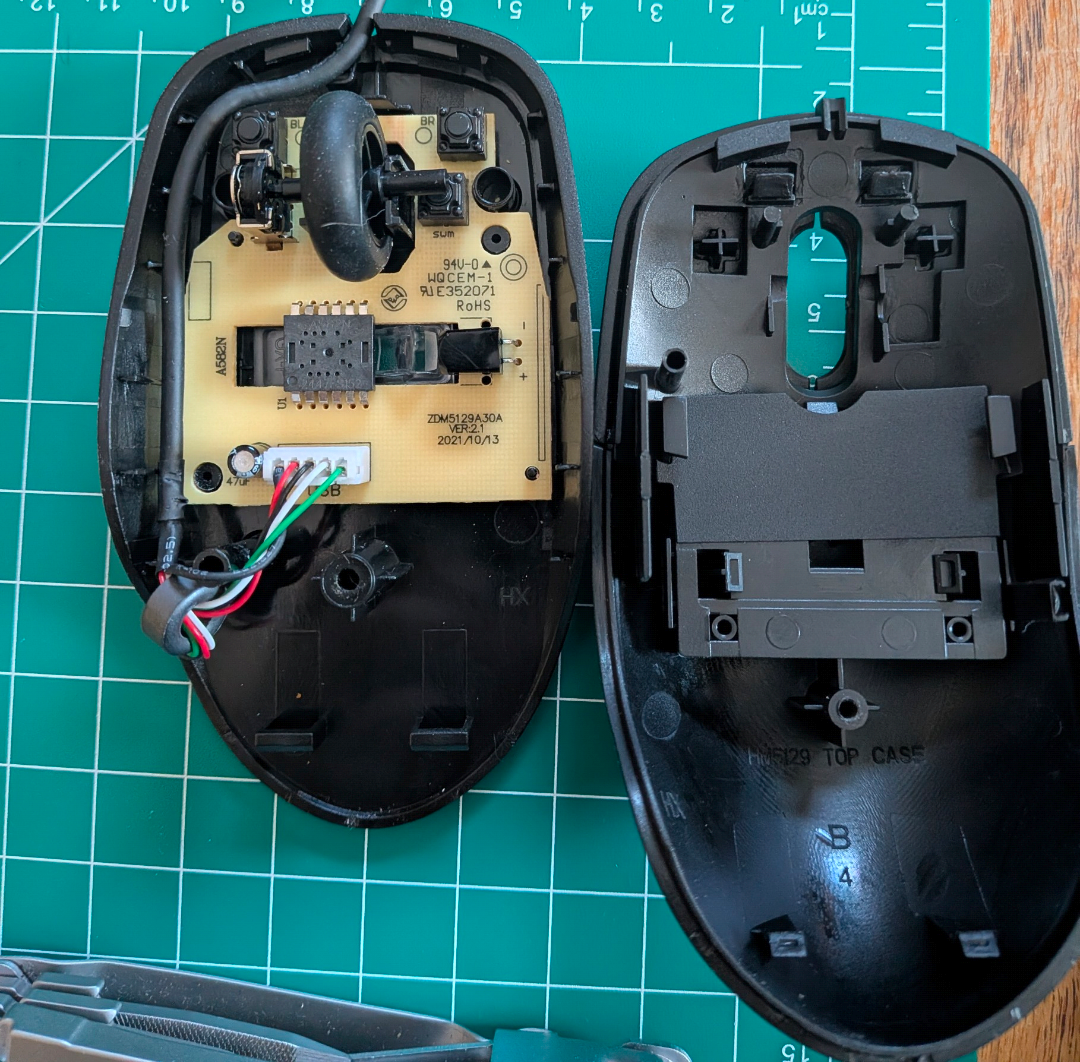
After freeing up more space in the shell, I needed to remove the white connector piece from the stock PCB, this can be done gently with a small flathead screwdriver.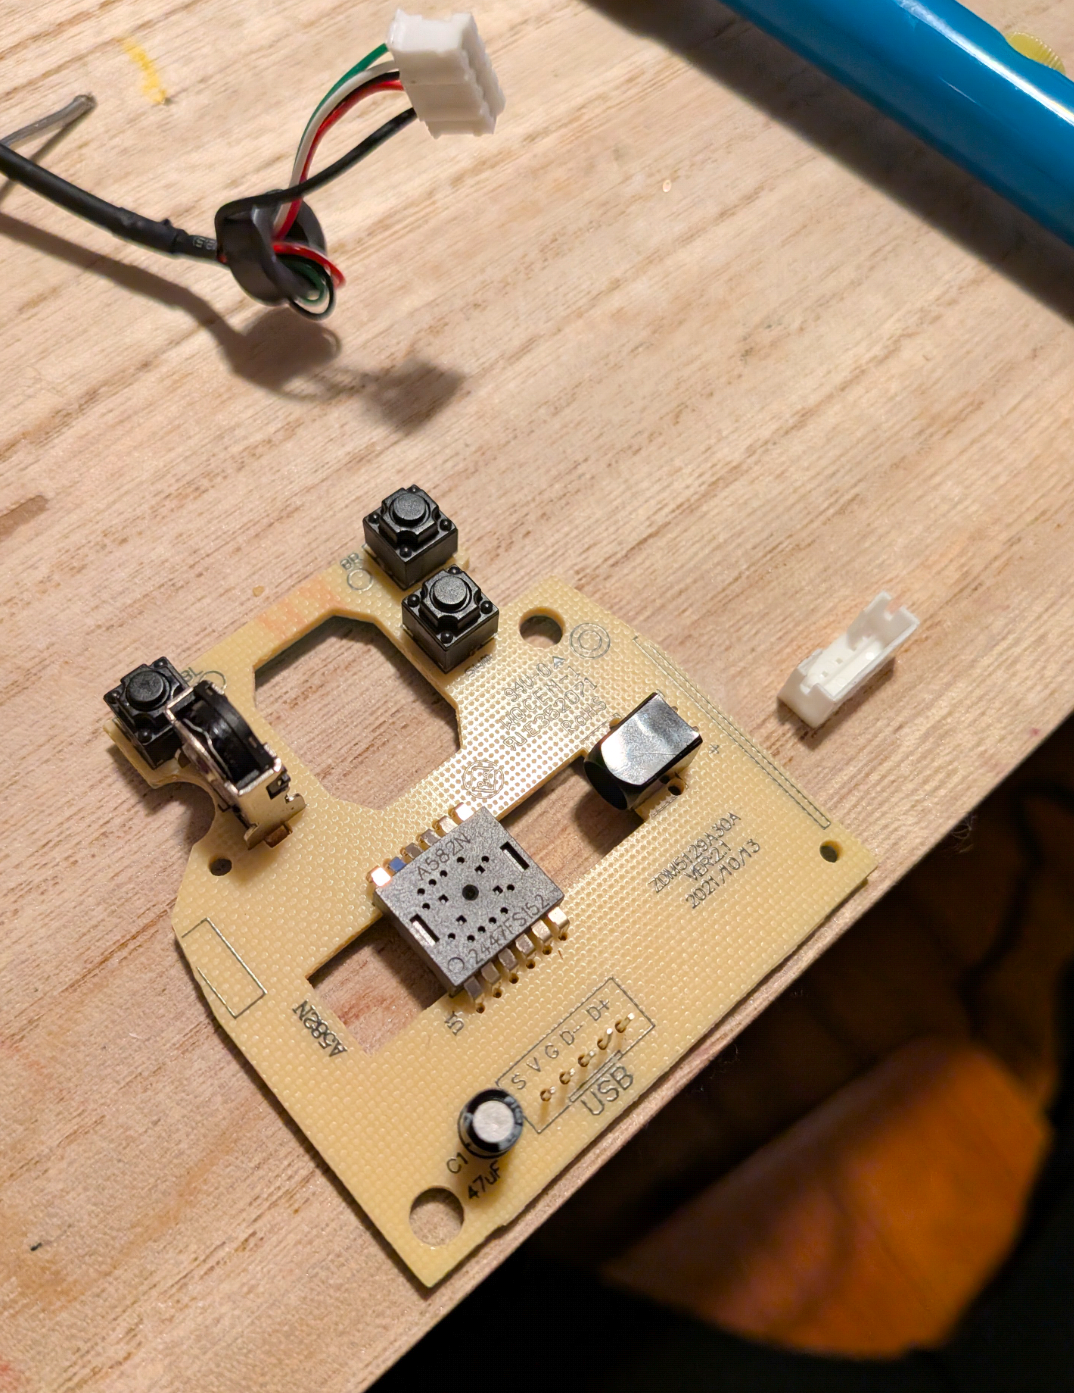
I then began to start programming the RP-2040 Zero, this will perform the actual exploitation.
My original idea was to just run pico-ducky inside a mouse, but this isn’t directly compatible with the RP-2040 zero.
Check out the code here
I take no responsbility for malicious usage, this tool’s intention was for education alone.
After programming the RP2040 chip, I just had to solder the pigtail cable and dupont wires to the USB breakout. This was by a long shot the biggest learning experience for me during this project, I had a little bit of soldering experience before this project, and by experience I mean failing.
It took me around a week to get good enough at soldering through-holes components to be comfortable on the real deal, but it worked out in the end!
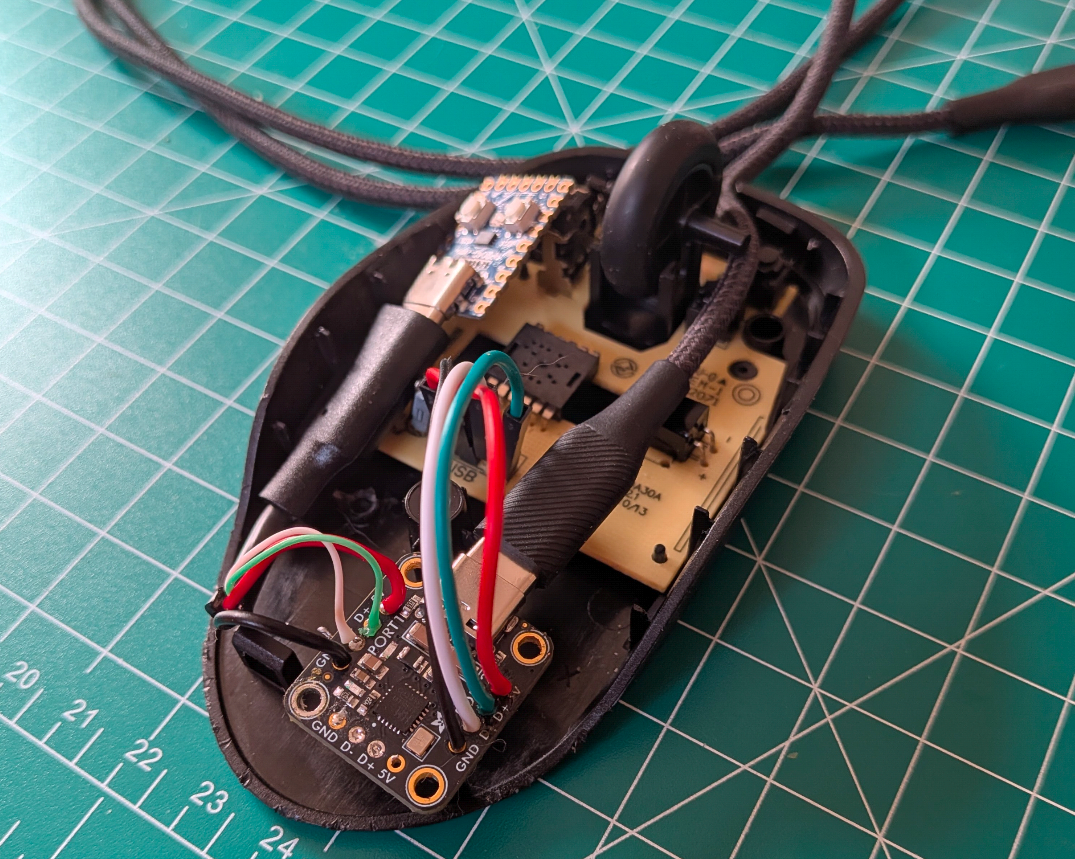
Before the final assembly, its important that we prevent short circuits by adding a piece of kapton tape to the bottom of the components resting on the PCB, this will insulate any electricity from spreading.
Now all I had to do is connect the dupont wires to the PCB and jiggle it around until I found a configuration that fit the mouse shell. I got the shell to close (and still be functional) with this arrangement:
Reverse Shell Demo
Now is the moment you’ve been waiting for. Time to see it in action: For anyone confused, I get an admin-level reverse shell sent to laptop B just a few seconds after the mouse is plugged in to laptop A, this essentially means I’ve fully compromised laptop A just by plugging in a “mouse”… scary world we live in.
For extra stealth, we can take additional measures like hiding the command prompt, or establishing a Windows task for persistence.
Overall, this was a fun project that taught me alot about custom firmware, working with HID libraries and soldering electronics.
If you make your own, I advise you to try and improve upon mine, try adding things like remote activation, advanced windows defender bypasses, or build your code in rust for faster keystrokes.